
福利厚生制度・働き方支援 | キャリア採用 |リクルート | テクノプロ・デザイン社
テクノプロ・デザイン社のキャリア採用サイトの「福利厚生制度・働き方支援」のページです。柔軟性の高い働き方を実現するための制度をご紹介します。
https://www.technopro.com/design/recruit_cp/career/company-systems/

今回は弊社の技術ブログ「テクノヒント」より、画像をつかったディープラーニング技術の活用事例をご紹介したいと思います!これまでとはまた異なり、技術的な記事になりますので、是非ご覧ください!
顔置換とはその名の通り、顔を入れ替える技術です。
映画業界ではよく使われている技術らしく、映画「ワイルド・スピード sky mission」で撮影途中で亡くなったポール・ウォーカーの代役に顔置換技術を使うことで作品を完成させました。 映画「アバター」も同様の技術が使われていて映像業界ではメジャーな手法のようです。
今回はその技術を体感してみたいと思います。
type11(ライターネーム)
2013年にテクノプロ・デザイン社に中途入社。
POSレジシステムの開発・保守を約4年、WiFiとBluetooth制御ICチップを検査する専用ソフトウェアの開発・保守を2年経験。 その後、約4カ月のDST研修と2カ月OJT期間を経て現在のデータサイエンス業務に配属。 主にPoC実装・分析業務を担当。
趣味はRaspberry Pi、パン作り。
それでは環境構築を始めたいと思います。今回はPCに負荷のかかる作業になるのでGPUアリの前提で進めます。
【 筆者PC構成 】
CPU:i9-9900K
メモリ:48GB
GPU:NVIDEA Geforce RTX2070(8GB)
OS:Windows11 Pro
【 構築手順 】
1)Dockerのインストール
Dockerのインストールについては別途調べてインストールしてください。(そのままインストールするだけなので難しくないはず) そのあとに、power shellで起動していることを確認してください。
2)Dockerfile、docker-compose.yml作成
Dockerを使い顔置換プログラム環境を作成します。
作業用のフォルダを適当に作成して2つファイルを作成します。
以下の内容で保存してください。※Dockerfileは拡張子をなくしてください。
docker-compose.yml YAML
version: '3'

services:

 swap_face_image:

  build: ./

  image: swap_face_image

  container_name: swap_face

  command: jupyter lab --port 8888 --ip=0.0.0.0 --allow-root --NotebookApp.token='' --no-browser

  deploy:

   resources:

    reservations:

     devices:

      - driver: nvidia

        count: 1

        capabilities: [compute, utility, graphics]

  ports:

    - 8888:8888version: '3'

services:

 swap_face_image:

  build: ./

  image: swap_face_image

  container_name: swap_face

  command: jupyter lab --port 8888 --ip=0.0.0.0 --allow-root --NotebookApp.token='' --no-browser

  deploy:

   resources:

    reservations:

     devices:

      - driver: nvidia

        count: 1

        capabilities: [compute, utility, graphics]

  ports:

- 8888:8888#FROM nvidia/cuda:10.1-cudnn7-devel-ubuntu18.04
FROM meadml/cuda10.1-cudnn7-devel-ubuntu18.04-python3.6:latest
ENV TZ=Asia/Tokyo
RUN ln -snf /usr/share/zoneinfo/$TZ /etc/localtime && echo $TZ > /etc/timezone
# GPGキーの取得
# apt-get update や apt-get upgrade の前に
RUN apt-key adv --fetch-keys https://developer.download.nvidia.com/compute/cuda/repos/ubuntu1804/x86_64/3bf863cc.pub
RUN apt-key adv --fetch-keys https://developer.download.nvidia.com/compute/cuda/repos/ubuntu1804/x86_64/7fa2af80.pub
RUN apt update
RUN apt-get update
RUN apt-get install -y python3-pip
RUN pip3 install -U pip
RUN pip3 install --upgrade setuptools
RUN apt-get install -y wget libgl1-mesa-dev libglib2.0-0 git ffmpeg libavcodec-dev libavformat-dev libavutil-dev libswscale-dev
RUN pip3 install jupyterlab
RUN git clone https://github.com/sberbank-ai/sber-swap.git
RUN pip3 install -r ./sber-swap/requirements.txt
RUN sh ./sber-swap/download_models.sh
RUN wget -P ./sber-swap/arcface_model https://github.com/sberbank-ai/sber-swap/releases/download/arcface/backbone.pth
RUN wget -P ./sber-swap/arcface_model https://github.com/sberbank-ai/sber-swap/releases/download/arcface/iresnet.py
RUN wget -P ./sber-swap/insightface_func/models/antelope https://github.com/sberbank-ai/sber-swap/releases/download/antelope/glintr100.onnx
RUN wget -P ./sber-swap/insightface_func/models/antelope https://github.com/sberbank-ai/sber-swap/releases/download/antelope/scrfd_10g_bnkps.onnx
RUN wget -P ./sber-swap/weights https://github.com/sberbank-ai/sber-swap/releases/download/sber-swap-v2.0/G_unet_2blocks.pth
RUN wget -P ./sber-swap/weights https://github.com/sberbank-ai/sber-swap/releases/download/super-res/10_net_G.pth
RUN pip3 install opencv-contrib-python
RUN pip3 install opencv-python==4.4.0.46#FROM nvidia/cuda:10.1-cudnn7-devel-ubuntu18.04
FROM meadml/cuda10.1-cudnn7-devel-ubuntu18.04-python3.6:latest
ENV TZ=Asia/Tokyo
RUN ln -snf /usr/share/zoneinfo/$TZ /etc/localtime && echo $TZ > /etc/timezone
# GPGキーの取得
# apt-get update や apt-get upgrade の前に
RUN apt-key adv --fetch-keys https://developer.download.nvidia.com/compute/cuda/repos/ubuntu1804/x86_64/3bf863cc.pub
RUN apt-key adv --fetch-keys https://developer.download.nvidia.com/compute/cuda/repos/ubuntu1804/x86_64/7fa2af80.pub
RUN apt update
RUN apt-get update
RUN apt-get install -y python3-pip
RUN pip3 install -U pip
RUN pip3 install --upgrade setuptools
RUN apt-get install -y wget libgl1-mesa-dev libglib2.0-0 git ffmpeg libavcodec-dev libavformat-dev libavutil-dev libswscale-dev
RUN pip3 install jupyterlab
RUN git clone https://github.com/sberbank-ai/sber-swap.git
RUN pip3 install -r ./sber-swap/requirements.txt
RUN sh ./sber-swap/download_models.sh
RUN wget -P ./sber-swap/arcface_model https://github.com/sberbank-ai/sber-swap/releases/download/arcface/backbone.pth
RUN wget -P ./sber-swap/arcface_model https://github.com/sberbank-ai/sber-swap/releases/download/arcface/iresnet.py
RUN wget -P ./sber-swap/insightface_func/models/antelope https://github.com/sberbank-ai/sber-swap/releases/download/antelope/glintr100.onnx
RUN wget -P ./sber-swap/insightface_func/models/antelope https://github.com/sberbank-ai/sber-swap/releases/download/antelope/scrfd_10g_bnkps.onnx
RUN wget -P ./sber-swap/weights https://github.com/sberbank-ai/sber-swap/releases/download/sber-swap-v2.0/G_unet_2blocks.pth
RUN wget -P ./sber-swap/weights https://github.com/sberbank-ai/sber-swap/releases/download/super-res/10_net_G.pth
RUN pip3 install opencv-contrib-python
RUN pip3 install opencv-python==4.4.0.463)コンテナ作成
以下のコマンドをpower shellで実行するとコンテナ作成できます。
docker compose -f (docker-compose.ymlのフルパス) up -d例えばworkフォルダを作成してDockerfile、docker-compose.ymlを作った場合は以下のようになります。
docker compose -f D:\work\docker-compose.yml up -dまた、コンテナ作成には時間がかかります。(筆者環境では2~3時間)
構築が終わるまでゆっくりお過ごしください。
4)プログラム実行
エラーが発生せずに終わるとコンテナが作成されて起動状態になっています。
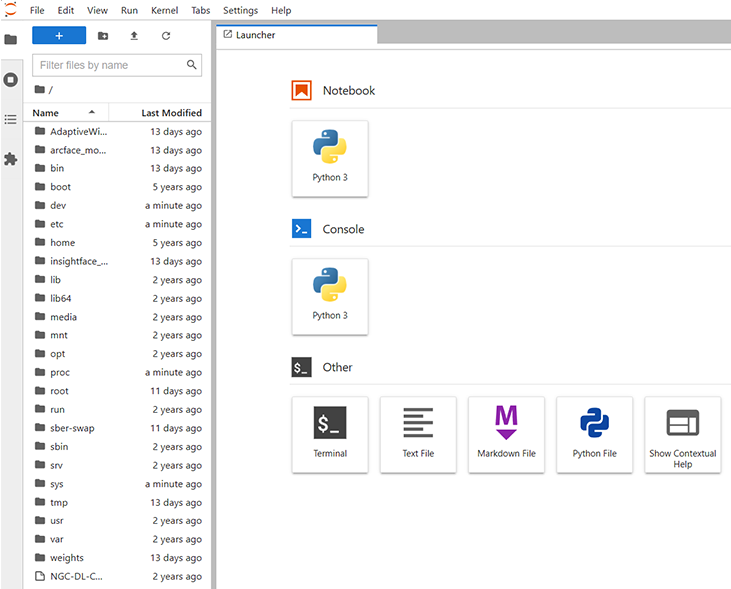
ブラウザから「localhost:8888」を打ち込んでアクセスするとjupyter labの画面に入れます。
画面からsber-swapフォルダに入りノートブックファイル(SberSwapInference.ipynb)を動かすと顔置換スクリプトが実行できます。
顔置換を見破る方法
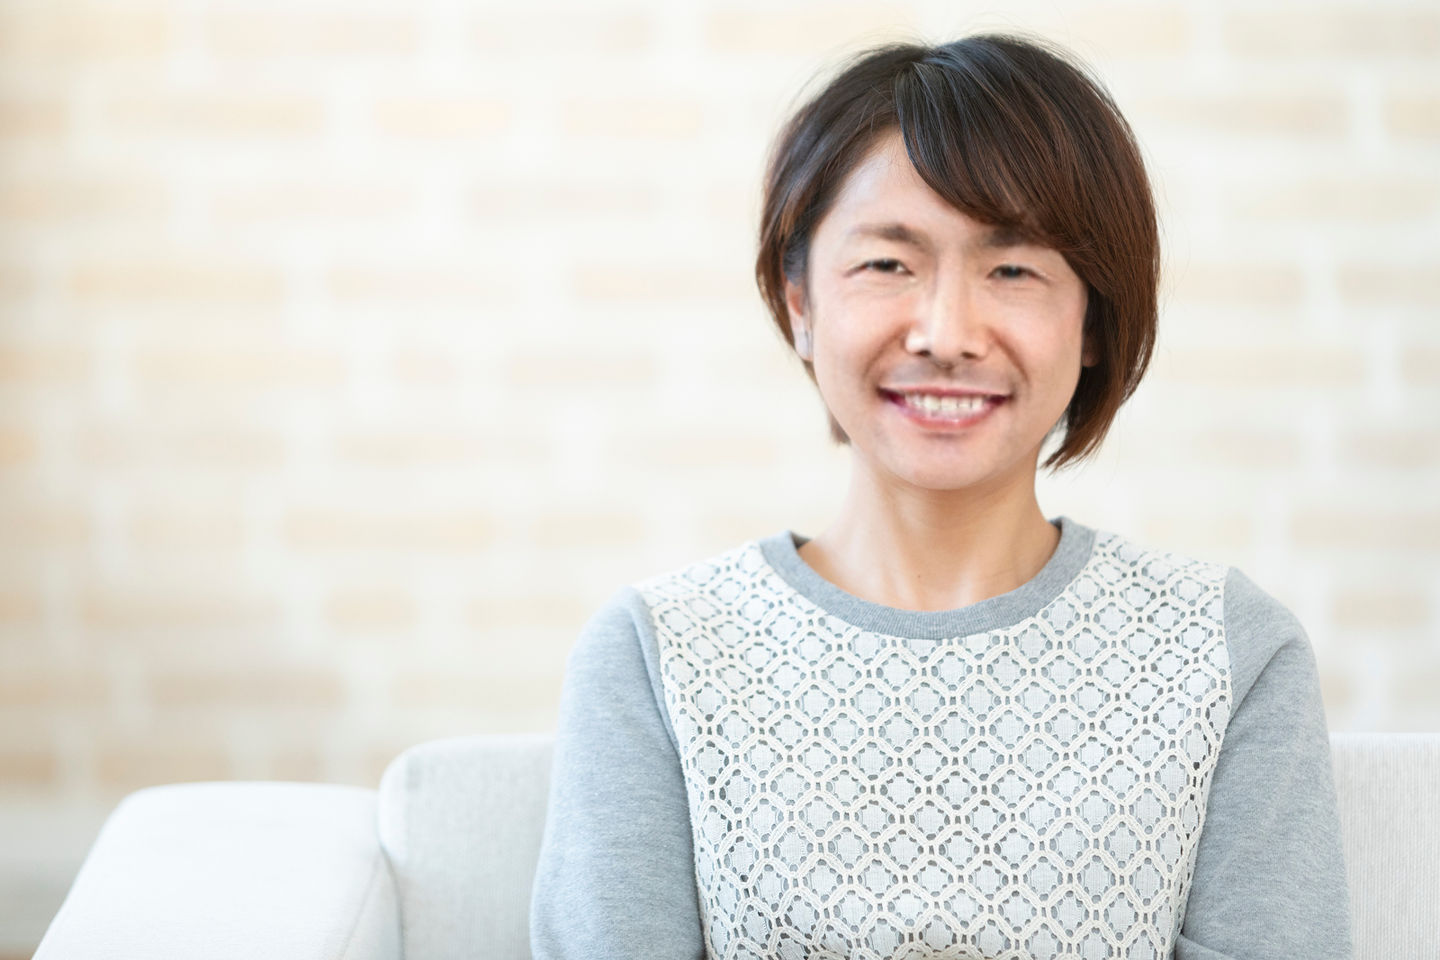
今回は以下のサンプル画像を使って動かしてみました。
顔置換が分かりやすいように男女の画像を組み合わせて出しました。
この画像(Source Image)は歯を出していませんが元画像(Target Image)に合わせて歯を出した状態で顔置換されていることが分かります。
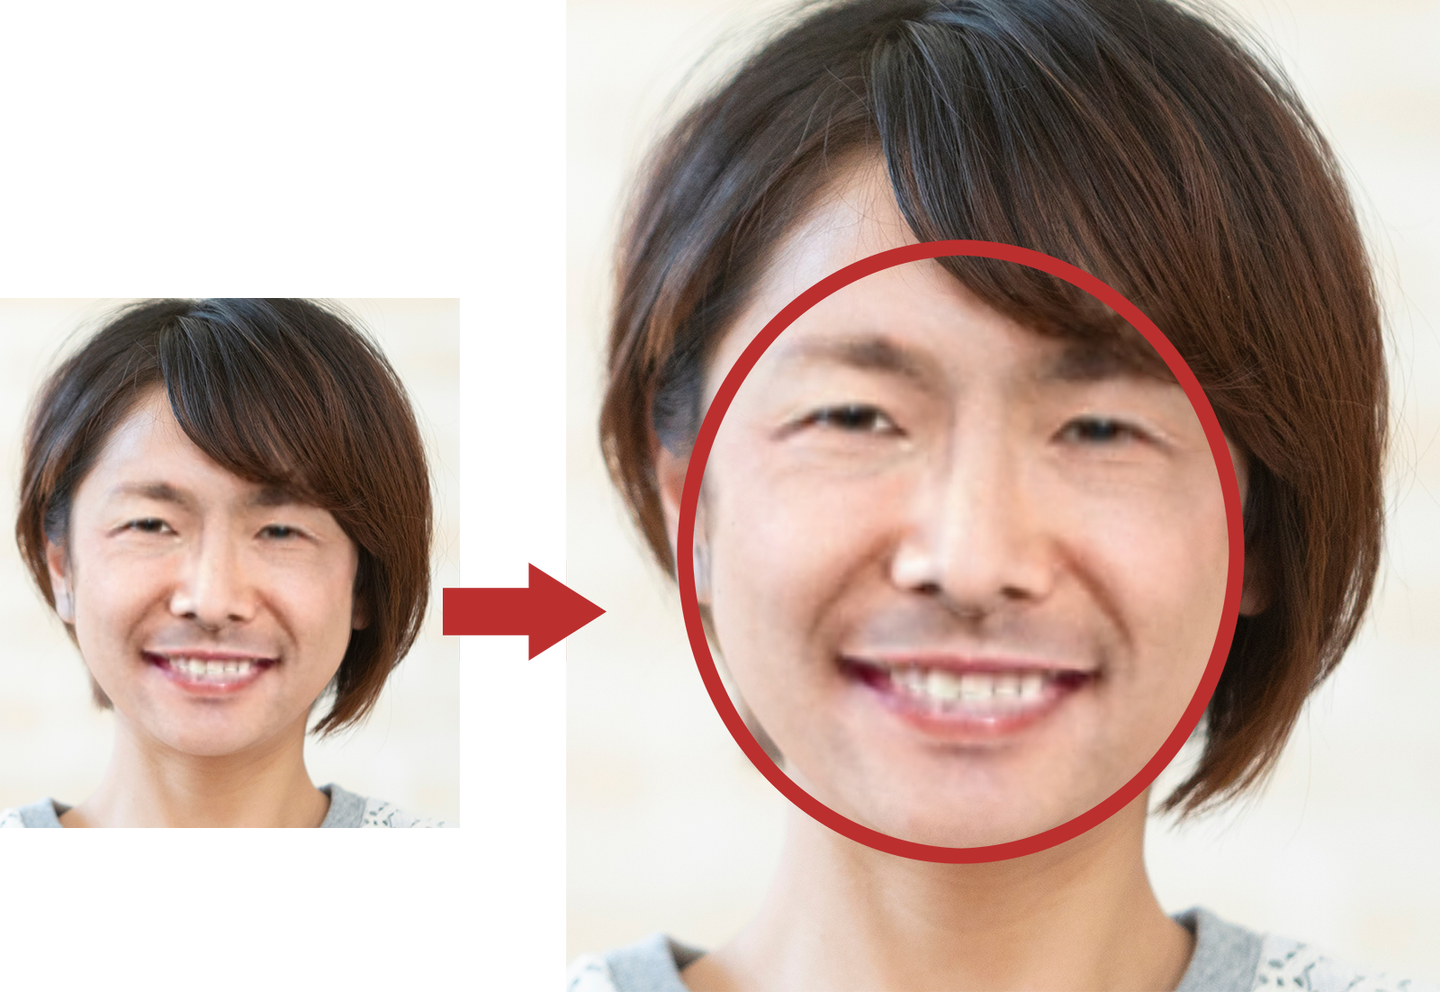
うまく言った顔置換ですが今度は見破れるかを検証したいと思います。
アナログ的な方法ですが拡大してみます。
拡大してみると顔のあたりがすごくぼかされていることがわかります。
また、生え際もよい感じで合わせていますが男性の髪色が反映されていることがわかります。細かい点相違点はほかにもありますが顔置換をなじませるためにぼかしを使っているようです。このぼかしに気づくことができれば何とか見破れるかもしれません。
ほかに有用な方法があるかもしれませんが、顔置換画像をいっぱい作って顔置換判別モデルを作ってみるのもいいかもせれませんね。
▼テクノプロ・デザイン社の福利厚生制度・働き方支援について知りたい方はこちら
▼新卒・第二新卒:テクノプロ・デザイン社の福利厚生制度・働き方支援について知りたい方はこちら
/assets/images/12738454/original/6c0f1e56-406f-4efc-b760-ad6214287335?1679280812)
![]()
/assets/images/15456332/original/15dc876b-a3dc-47ab-bb4c-0175efaff910?1698051930)